Slow Cooker

The view from the dining room – there will, eventually, be a built-in cabinet in front of that framing.

Phase one of the long-awaited kitchen project has begun. What was a full bath on the first floor (only the sink was working properly when I bought the place) and the tiny pantry behind it have been torn out, and are framed. The larger of the two rooms (the former bath) will be a pantry (above), with a door leading into both the kitchen and the dining room. On the backside will be a tiny powder room, with just enough room for a small sink, a toilet and a litter box (that last is for the cat, just to be clear).

The half-bath will be tucked in here. Yes, the framing at the back is tied directly to the floor, All the non-load-bearing walls in this house were framed that way originally – but my real reason is that in order to use plates, I’d have had to pull the studs out 2″-4″ closer to the door to clear the waste pip on the left, and water pipes on the right. In this space, every inch counts.

My electrician has added a few outlets and installed temporary lights. Now I just need my plumber to fit me into his schedule. In the meantime, I have to patch the floor in the pantry before sanding and refinishing. Then there’s drywall to hang and finish (walls and ceilings – ugh), trim to make and install where the original is missing, a tile floor to install in the powder room, and a big floor-to-ceiling cupboard to build.

I’m not starting on the kitchen proper until the pantry is done. Unlike during my last kitchen renovation, that will afford me some counter space and storage space to work with while the kitchen is out of commission, instead of cramming the entire kitchen contents and appliances into my dining room and living room. (This time I’ll get away with just most of the kitchen contents and appliances crammed into the dining room and living room.)

This cracks me up – a tall cupboard atop the base cupboard hid the backside of the hardboard cabinet shown here – so there was a massive cabinet in the kitchen that had room in it for nothing (except another cabinet). I wasn’t sure what I’d see when I took all this out.
The open-frame doorway is what was behind the walls and the bathroom shelves – clearly an original door opening (though sadly the original trim is MIA).
Posted in Uncategorized | 3 Comments

Half-baked House Projects

The finish looks better in person than in this photo, BTW. Crap lighting.

I am woefully behind in posting about house renovation progress – probably because it takes me forever to finish things and take a “beauty shot.” My problem is that once a project is functional, I let it function…instead of first wrapping up all the details.

My hallway built-in is a good example.

I wrote about the planning, the start of the build and the finish (as in shellac). But I can’t write about it being finished…because it still isn’t. I need to install the pull-out shelf that is meant for folding towels upon, the base moulding (to match the base moulding on the walls) and crown moulding to hide the top of the plywood carcase and fill the gap between the face frame and ceiling. Oh – and doors, of course. It will (eventually) get double doors.

But it works just fine now for its intended purpose. And the customer isn’t complaining, so…. Actually, I was complaining while sanding the floors. Doors would have helped to keep out the dust. Maybe. I had to take out and wash all the sheets and towels after the floors were done. That would have been a great time to build and install those doors…but I was too tired from the floor work!

And my bathroom – it is fully functional and looks done. If you ignore that there’s no door on the room. (I live by myself – doesn’t matter.)

Plus I still need to buy and hang another towel rack to the left of the shower entrance, and grind away tiny bits of tile so I can screw in the faceplate on an outlet, instead of just balancing it on there. But for that, a Dremel would be the ideal tool…and in my hasty departure, I inadvertently left my Dremel at PopWood. I’m not buying a new one just to grind two tiny holes. Surely I’ll need one for a “real” project some day? Then I’ll replace it.

I also need to clean the face of the outlet. Oops.

Then there’s my stairs. I started on this project just after I bought the house, when I ripped out the wall that had been put in to divide the house into two apartments. But once I got everything torn out that was going to get torn out, I stopped for several years.

https://rudemechanicalspress.files.wordpress.com/2015/08/830.jpg
I can’t bear to live like this for long; tear-out took me only a week or two.
But I lived with this (though with uglier floors) for four+ years.

If you follow me on Instagram (where I’m a far more frequent poster than here), you know that I finally got tired of never getting around to it, so I hired a contractor to finish it…then fired the contractor because the work didn’t live up to their promise. I channeled my anger to finish the railing and balustrade myself…but we’ll see how long it takes me to finish those two bottom stairs, the newel posts, the trim and the bookcase that’s going at the open side of the lower landing. Because the stairs are now almost safe (as long as I can balance on a stringer) and thereby darn near fully functional.

Olivia doesn’t seem to miss those two steps.

And there’s the guest bathroom that was (almost) finished years ago. It, too, is fully functional (it’s what I used while re-doing the other one)…but still needs a couple drywall patches in the ceiling and on the walls. Then another coat of paint. But who has guests right now? (So it’s become a storage room of sorts over the last year.) My excuse for this room is that when I redo the kitchen (directly below it), I’m building in a chase for a 2″ drainpipe alongside the chimney (to the left of the sink) so that I can move the washer and dryer up here. So when I do that, there will be more drywall work in this room – might as well wait!

Hard-won renovation realization: Don’t put a clawfoot tub in your guest bath if any of your visitors are elderly. This is, in fact, “my” bathroom whenever my mom visits. The walk-in shower in the bathroom attached to my bedroom is much more user friendly for older joints (consequently, I also lose my bedroom during my mom’s visits!)
Still, the guest bath has come a long way… (Sorry for the fuzzy – I was sent this by the former owner.)

But by far the most egregious case of (not even) half-done is the downstairs bath that will someday become a pantry. I started the tear-out, then realized I had to stop because any more would open up holes to the basement through which the cats (now a single cat) could slither, and the basement isn’t pet friendly. Plus there’s a door on that room, so I can close it most of the way and ignore it. (And it’s so bad that I refuse to show a picture.) I’ve vowed that I won’t do any more work on that room (or touch the kitchen) until all the details above are done. Or at least until I have time, energy and money to do the kitchen, pantry and adjoining half-bath from start to finish (or close enough to finished) in one fell swoop.

But first, there’s also the rest of the wood windows to install, the doors to hang on my study shelves, fascia board on the porch that needs replacing, the almost-torn out linoleum floor on the third floor and Guilder to frame for it. I’m swamped!

Posted in Uncategorized | 11 Comments

Down here, where we’re at

Kitty and Wally, checking out the new boxes.

First, my fervent thanks to everyone who has helped me to keep the lights on by buying copies of “Mechanic’s Companion.” I appreciate your support with my micro publishing company more than I can express.

When I precipitously left Popular Woodworking (three years ago to this day; a wee dram is in order!), I had little clue how I was going to pay the bills. Sure, I was already doing a little freelance work for Lost Art Press and teaching a class here and there, but that wasn’t near enough to cover the mortgage – much less keep the cats in kibble. So, with the blessing and help of Christopher Schwarz and John Hoffman at LAP, I started my own micro publishing company, Rude Mechanicals Press.

Just as Chris and John did for years after founding LAP, I packed and shipped orders from my dining room and living room – but having piles of boxes as end tables and side tables was starting to wear on me. (My basement is a little too damp in which to safely store books, and my attic temps and humidity fluctuate too wildly to keep them undamaged.)

So, again with the kind help of Chris and John, here’s the solution:Lost Art Press has bought my remaining stock, and will soon have “Mechanic’s Companion” in the store (I’m delivering the boxes to the Indiana warehouse this Thursday). The best news is that Lost Art Press is committed to keeping all of its books in stock – something I cannot afford in space or money. So, I’ll work with LAP “Mechanic’s Companion” reprints under the Lost Art Press imprint.

I’ve also mentioned a book of measured Shaker drawings in my future. That, too, will likely be with LAP – though I expect that’s still at least two years out because at the moment I’m busy on a Dutch tool chest book for 2021 publication.

Rude Mechanicals Press lives on, though – the name works for my freelance editing, and writing. Plus, cases of at least one of the future books I’ve mentioned, “Shakespeare’s Furniture,” will almost certainly serve as end and side tables in my house – I can’t see LAP taking that one. In the meantime, I’ll try to train my new cat, Olivia, to pack and ship.

I don’t think Olivia’s going to be much help.

Posted in Uncategorized | 12 Comments

Production Turning: It Ain’t Me, Babe

Spindles

Update: I’ve found a Production Turner in Maine that I can almost afford, so…I sent a check. Thanks for all the suggestions/offers.

I’ve come to the sad realization that I will never find time to turn the 54 spindles I need to rebuild my staircase. In the four or so years I’ve been saying I’d make these myself, I’ve turned one. At that rate, I’d be 268 years old by the time they’re done. Seems a bit late, really.

I’d much rather spend my time writing, editing, teaching flat woodworking and building casework.

The spindles need to match those shown above (I have a sample to send), must be finish-ready red oak, and are 1-3/4″ square at the top and bottom, 30″ long. I’ve asked for a couple of quotes from companies I found online; I’m going to pay someone. But I’d rather pay someone I know (or at least “know” – through woodworking events, social media, etc.). So: If there are any U.S.-based production turners reading this who are interested, please send me an email (to 1snugthejoiner@gmail.com).

Posted in Uncategorized | 8 Comments

SOLD: Fancy Anarchist’s Tool Chest

overallopen

Update: this one has sold. (But if you’re interested in one, I do commission work.)

For sale: With my extra time during the lockdown, I was able to complete this hand dovetailed sugar pine Anarchist’s Tool Chest. Its exterior dimensions are: 39-3/4″ wide x 23-1/2″ deep x 24-1/4″ high (including the battens – aka rot strips – on the bottom). It has hand dovetailed bird’s-eye maple tills with quartersawn white oak shiplapped bottoms affixed with cut nails. All three tills are 8-1/2″ from front to back. The top two tills are 2-3/4″ high with 1/2″-thick bottoms; the bottom till is 5″ high with a 5/8″-thick bottom. The top till is 36″ wide, the middle till is 35-1/2″ wide, the bottom till is 35-1/4″ wide.

The remainder of the interior fittings – the slides for the tills, the tool rack and the moulding plane corral – are of figured hard maple.

The tool rack is slightly different than what is shown in the “Anarchist’s Tool Chest” book; I bump it out from the front chest wall to allow for the hanging backsaws behind the chisels, screwdrivers and other tools in the tool rack. (I find this not only protects them, but makes the saws easier to grab than from a bottom-mounted saw till.)

The chest bottom is tongue-and-groove pine boards affixed with forged Rivierre nails. The hand-forged hardware is the new “Anarchist’s Tool Chest Re-forged kit” from Horton Brasses.

The chest is $4,200 as is (including your General Finishes milk paint color of choice); that also includes crating (LTL shipping is paid by the buyer; it’s typically less than $250). Add-ons (real milk paint, an iron crab lock, casters (either new or re-conditioned vintage), custom interior fittings, etc.) are available as well. First one to respond with a definitive “yes” gets it. (My signature below is linked to my email.)

If you’d like to see more (including entirely too much on dovetail how-to) and outfitting the interior, check out my Instagram feed.

— Fitz

interior

uptop

closedhandle

Posted in Uncategorized | 1 Comment

June ‘Chronicle’ – Sneak Preview

Screen Shot 2020-05-30 at 10.27.28 PM

The new issue of “The Chronicle,” the quarterly journal for members of the Early American Industries Association is at the printer now. I’ll be asking for the updated mailing list to be sent early next week…so join now if you’re interested not only in this issue’s contents, but in a four-times-a-year dose of fascinating articles on the tools and trades that helped to build America.

In this issue:

OLYMPUS DIGITAL CAMERA

Welch & Griffiths Handsaws, by David La Touche
This Boston-based 19th-century company was founded by Charles Griffiths and William Welch, who trained in Birmingham, England, as sawmakers before emigrating to the United States where they founded the company that bore their name. The author owns a treasure trove of information – some never-before published – and shares the rich history of the firm, as well as type information about the saws themselves (some of the prettiest handles I’ve seen!).

Screen Shot 2020-05-30 at 10.46.16 PM

The Country General Store – Part 2, by Paul Wood
Wood has an unbelievable collection of tools and implements from a wide variety of trades, and has shared them with EAIA members over many years, with articles on subjects ranging from ice fishing to rural water systems to maple sugaring. In this four-part series, he discusses (and shows) the types of items that could be found at general stores. This installment covers kitchenware, foods, cloth, clothing, and domestic textiles.

Screen Shot 2020-05-30 at 10.54.42 PM

Plane Chatter: Layout Lines Reveal Mysteries of the Planemaking Trade, by Ted Ingraham
This column appears in most issues, with a rotating group of experts sharing their research on and experience with (mostly) 17th- through 19th-century handplanes of all sorts. In this issue, the author discusses scribe lines that remain on the sides of user-made wooden planes, and how those are used to determine the pitch. (Plus, he shares a simple formula for making wooden-bodied planes that requires only three simple dimensions and a consistent body size.)

Fig 1_No 1166 tape measure

Stanley’s first coilable and auto-retractable tape measure.

Stanley Tools: Stanley ‘Push-Pull’ Rules, by Walter W. Jacob
This regular column by Walt Jacob is (no surprise, given the kicker) devoted to the prolific output of The Stanley Works (founded in 1843) and The Stanley Rule and Level Company (founded in 1857), which merged in 1920. In this issue, he discusses “Push-Pull” tape measures, which the company began producing in 1932 after acquiring the tape rule business of Hiram A. Farrand, who invented the modern steel coilable tape measure in 1931. (You know – that indispensable thing you can never find when you need it…even though you probably have at least three of them!).

Screen Shot 2020-05-30 at 11.11.05 PM

For more information on EAIA, visit the website. And if you’d like to submit an article on any early American tool or trade please shoot me an email: 1snugthejoiner@gmail.com.

Posted in Uncategorized | Leave a comment

Let’s Go Dutch

DutchGreen

With square-shanked Rivierre nails (this is my travel chest…it’s a bit more beat up now).

Waiting for a book to print on the laser writer at the shop is boring, so Chris and I were talking to pass the time as we awaited the pages of Nancy Hiller’s “Kitchen Think”; it’s off to Kara Gebhart Uhl tomorrow for copy edit. He was printing; I was three-hole punching. Such fun we have!

I don’t know how we got to chatting about Dutch tool chests…but as of about 5 p.m. today, I’m writing a book on Dutch tool chests for Lost Art Press. I could not be more excited!

How many of these I’ve built and helped others to build, I don’t know… but I do know it is many. I can build the one I teach in less than two days, from rough lumber to hardware installation. It will take me a bit longer this time though; there will be many pauses along the way for photography.

DTC_Open

With screws (this one was for a customer).

Why, you might ask, if there’s already a good article on how to build this form, do we need a book on it? I’ll be going far beyond the article, presenting multiple approaches to several of the joints, and a choice of at least three ways to build the lid. And hardware – my goodness…some of the hardware people have brought to classes that I had to figure out how to install! So I’ll share a bunch of options on that, too…and what not to try to use and why. (For the record, I prefer unequal strap hinges.)

I’ll also be presenting several approaches to the interior fitments. But I have only so many Dutch tool chest interior variations in me – and there’s now a fair number of these chest in shops throughout the country and around the world. So while it’s early days (heck – we just decided on this book a few hours ago!), I’ll eventually be asking for your help – if you’ve built one and come up with a clever interior arrangement, I hope you’ll take some pretty pictures and send them my way so we can include a gallery.

And there are other Dutch tool chests to discuss (and possibly build), so there will also be research into other forms.

There’s no timeline, but I’m going to dive in soon – I have plenty of wide pine in the shop basement, and (unexpectedly) plenty of time this summer. Heck – I even have parts already sized in my basement…along with some half-finished chests. Time to put those to good use!

And why am I not publishing this through Rude Mechanicals Press? Well, Chris is the one who popularized this form; I wouldn’t dream of doing this book with/for anyone but him and Lost Art Press.

half-doneDTSc

This is what happens when you loan all your tools out by day 2 of a class.


Posted in Uncategorized | 13 Comments

Help Me Solve a Remuddling Mystery

From front

It’s the closed door (to the third floor) and the open door (from the back stairs) adjacent to it that aren’t right (as well as that weird opening between the front hall and back hall).

Two months ago or so, as the first step in renovating my kitchen, I started tearing out a first-floor bathroom that was in what was almost certainly a butler’s pantry – and will become so again. But this seems like a bad time to tear out the kitchen proper – and a bad time to spend a lot of money on 6/4 oak for the stair spindles – so I’m looking elsewhere for house projects.

One thing that has confounded me since before I bought the place is the second-floor opening to the back stairs and the adjacent door to the third floor. The configuration simply cannot be original, but darned if I can figure out what it ought to be.

fromback

Here, you can see where the anaglypta stops on the back stairwell, and the 16″-wide or so insert of drywall at the top of the stairs. But you can also see the original trim and painted anaglypta on the stairwell up to the third floor. It seems likely the short wall between the two should be pushed back…but then how would the trim carpentry work?

Today, I took out the remaining stops that had been installed to put a door at the top of the back hallway (and lock off what used to be a separate apartment), thinking that might give me more of a clue. The only thing it revealed was that my suspicion was correct – no way was there a door right there before. The wood (though clearly 100+ years old) in the jamb behind the stops is loosely inserted – not supporting or supported by anything other than a couple of round-shanked nails (all the original stuff is installed with cut nails). And the door header isn’t actually a header; it’s just a piece of wood the width of the doorway. Plus the trim installation is janky – as if it was moved and not reinstalled quite properly. And anaglypta on the bottom of the hall opening between the front of the house and back? Um, no.

closeuptrim

There is zero chance that the Germans who installed the trim work in my house in 1905 did any of this. I think most of it is original trim, but this was not its original location.

Probably, the framing was originally at about the same point where the anaglypta ends in the back stairwell. A neighbor has a similar floor plan, and her stairwells are just in front of the top/bottom stairs…but if so, then I can’t figure out the proper transition from the back hall stairs to the short wall between it and the door to the guest bath. I know those walls are original; they’re plaster over lathe, and I can see the original plaster behind the anaglypta that is pulling away from the wall there.

bathroomwall

I’m positive these two walls are original.

Jen

This is my neighbor’s back hall; similar stair setup, but no short wall to the right, as in mine.

So that’s my current renovation headache – what to do? The obvious answer is to take out the trim and what has clearly been added later – the drywall and the hardboard that’s above the doorways. That’s most likely to give me the answers. But that will leave things open to the third floor…to which I wish to lose neither heat or my cat. So I’ll wait on that until the temperature is likely to stay above 60°…then just let the cat have her way.

But if anyone reading this owns a 1905(ish) four square with a similar setup, I’d love to hear from you (with pictures). Anything to keep me from tearing out the kitchen!


Posted in Uncategorized | 13 Comments

Big-A** Medicine Cabinet

IMG_7299 copy
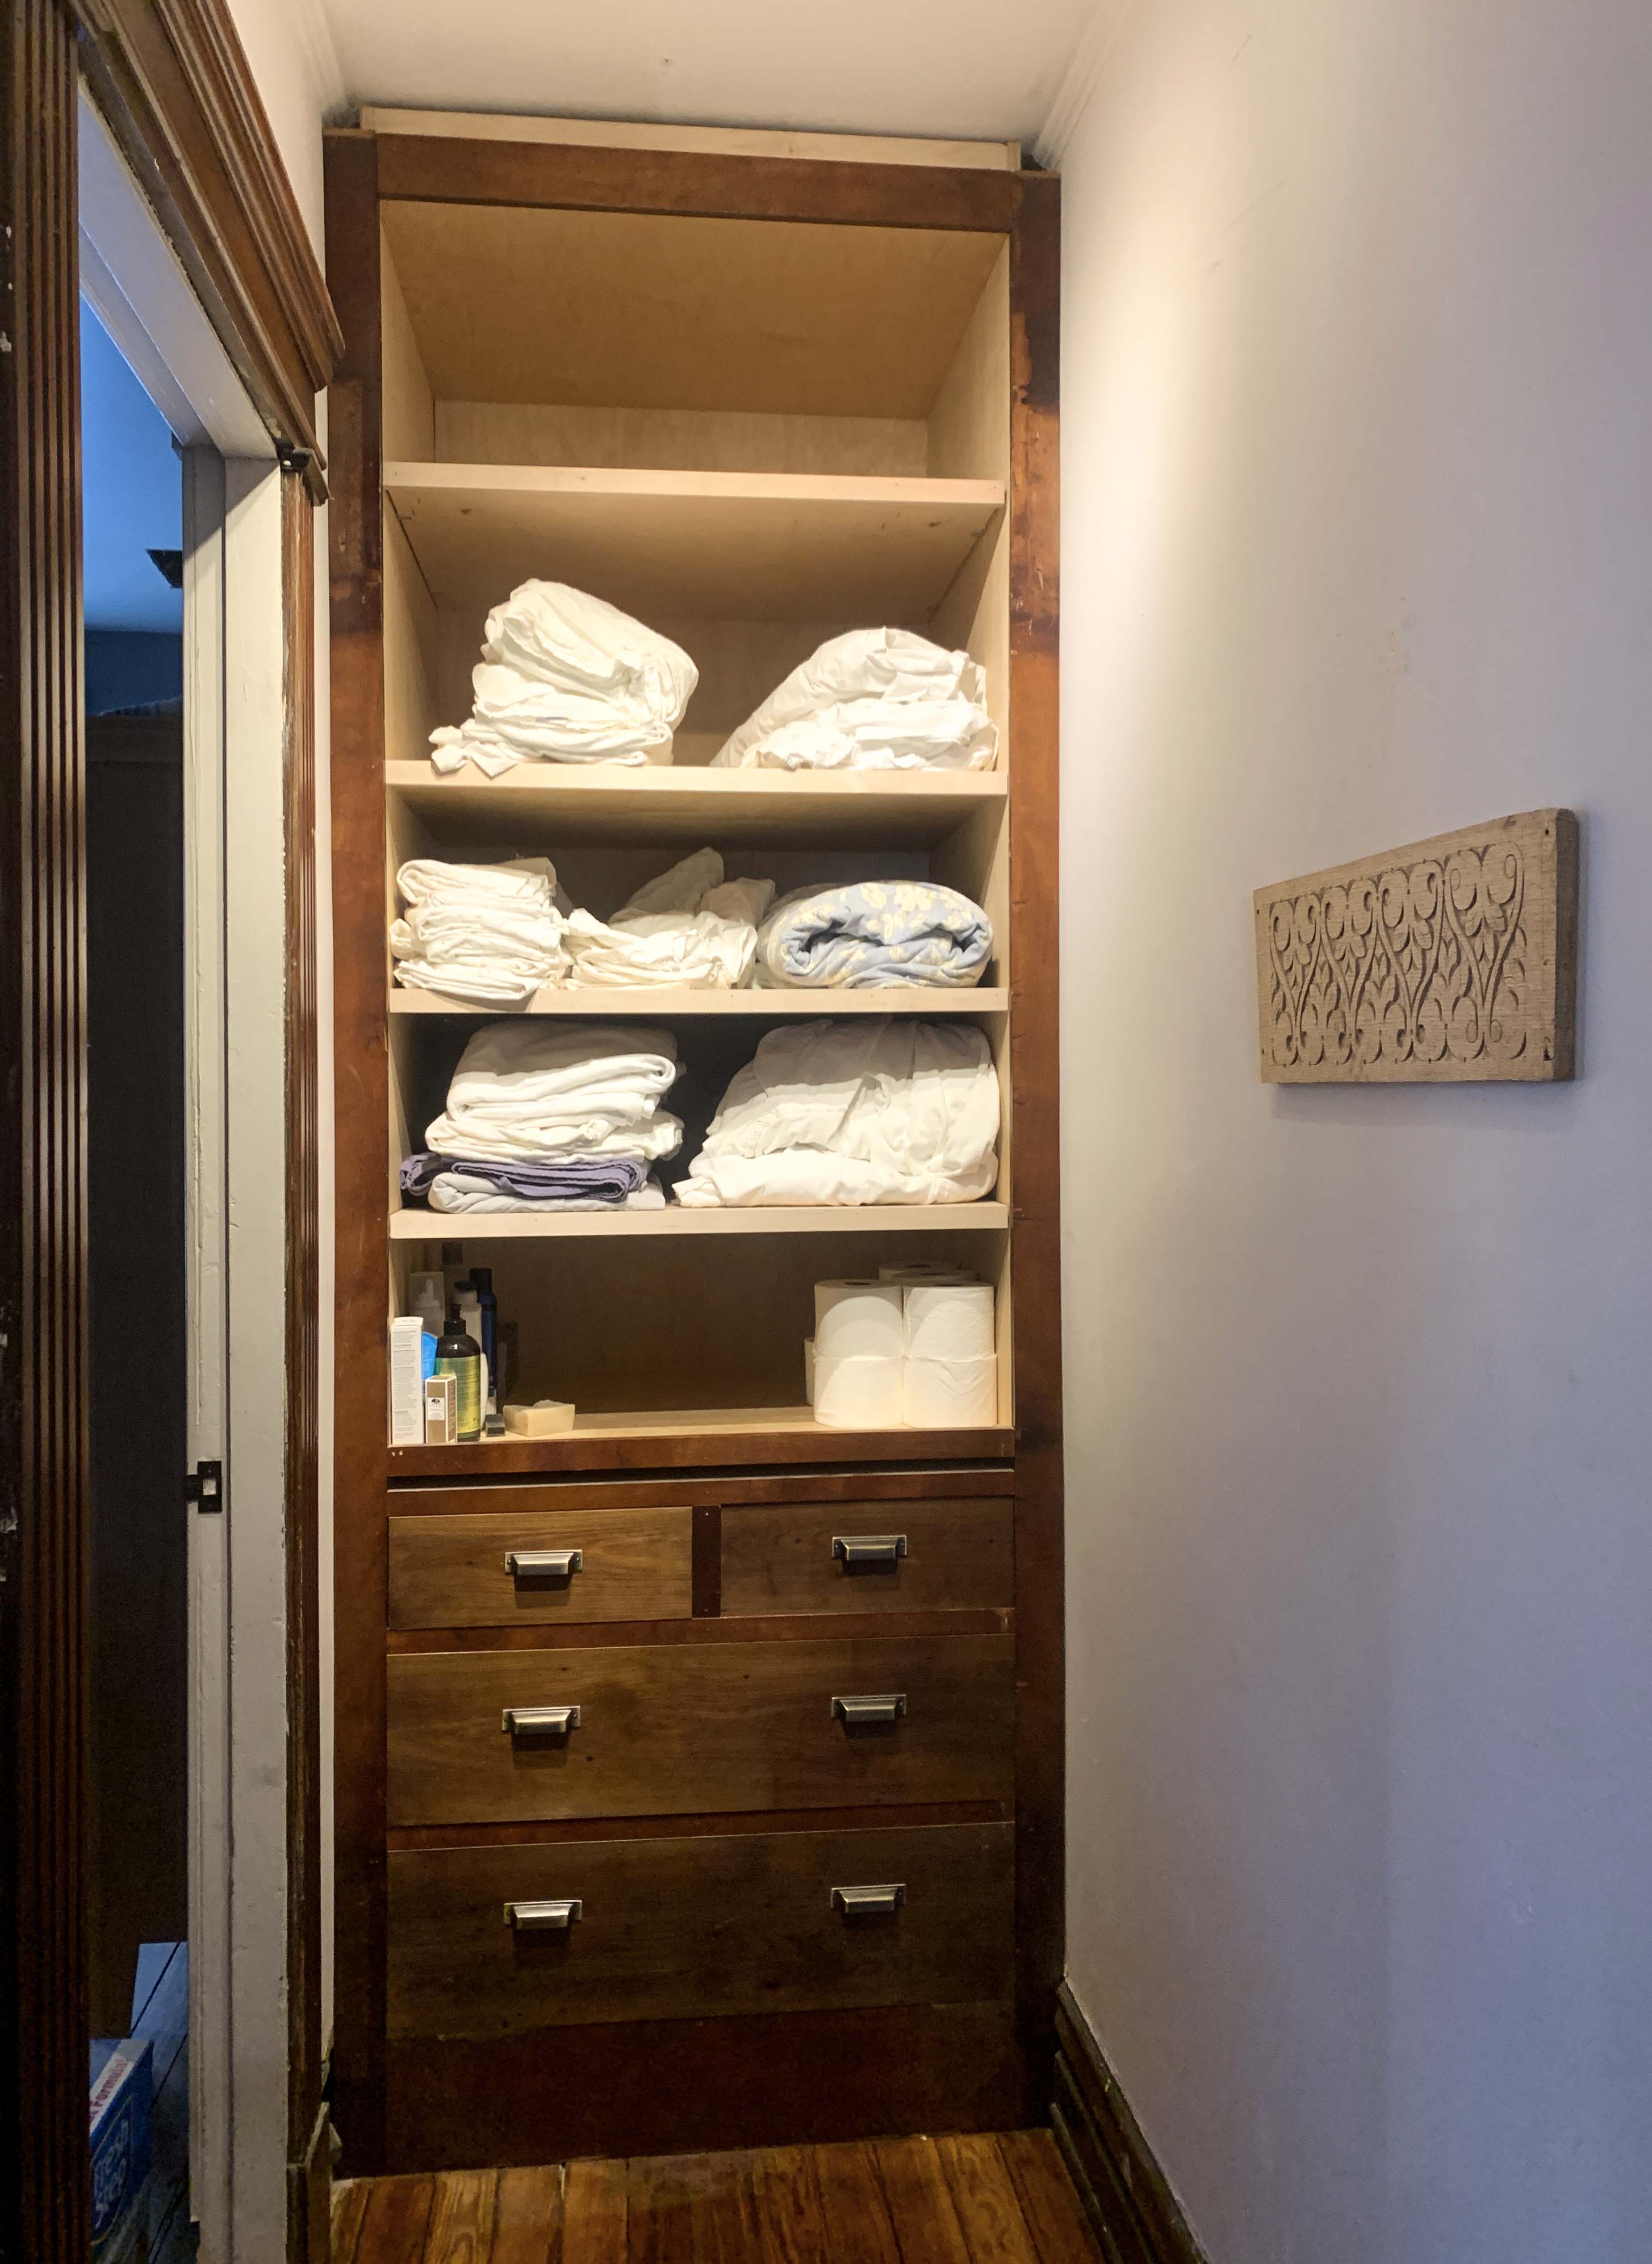
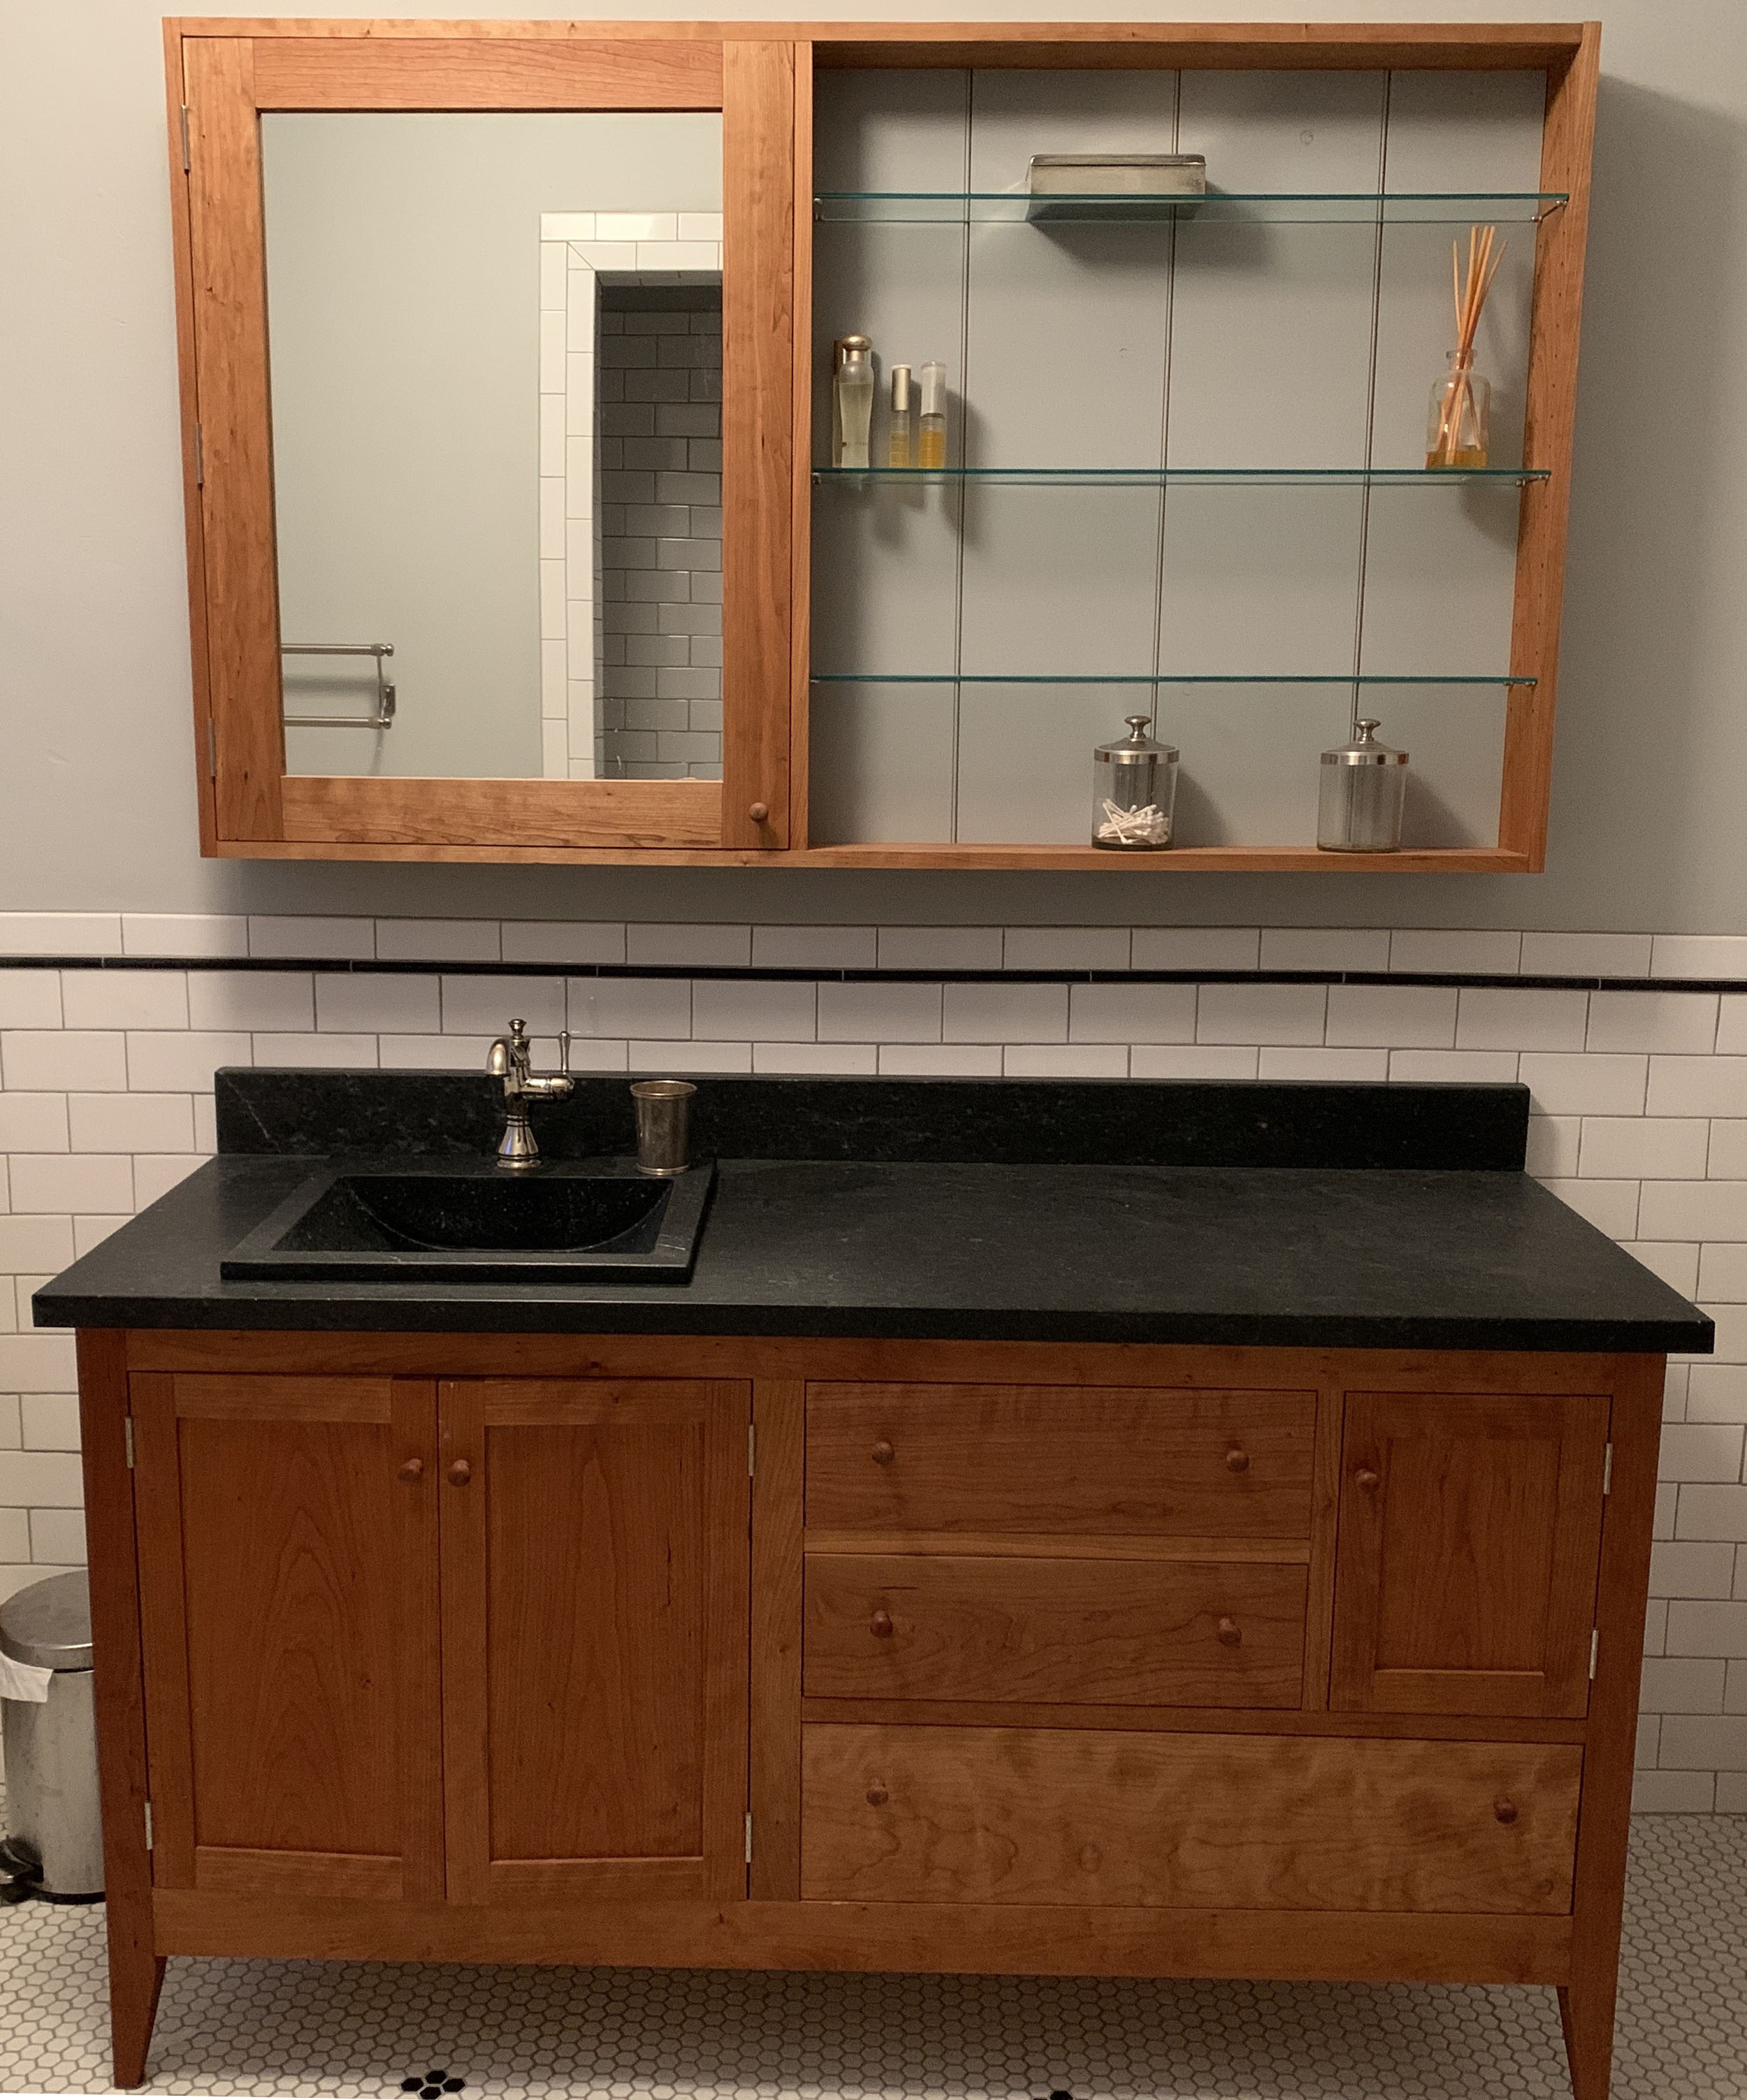
A woodworking friend asked about the specs of the cherry medicine cabinet/open shelving I recently made for my bathroom, so I sat down at my computer to send her the SketchUp model. But I cannot find it (did I even do one?). So instead, here are the details…with my usual caution about not trusting cutlists or any measurements. And anyway, I recommend sizing this to what’s above and beneath. Mine is based on the vanity and the 9′ height of the ceiling.

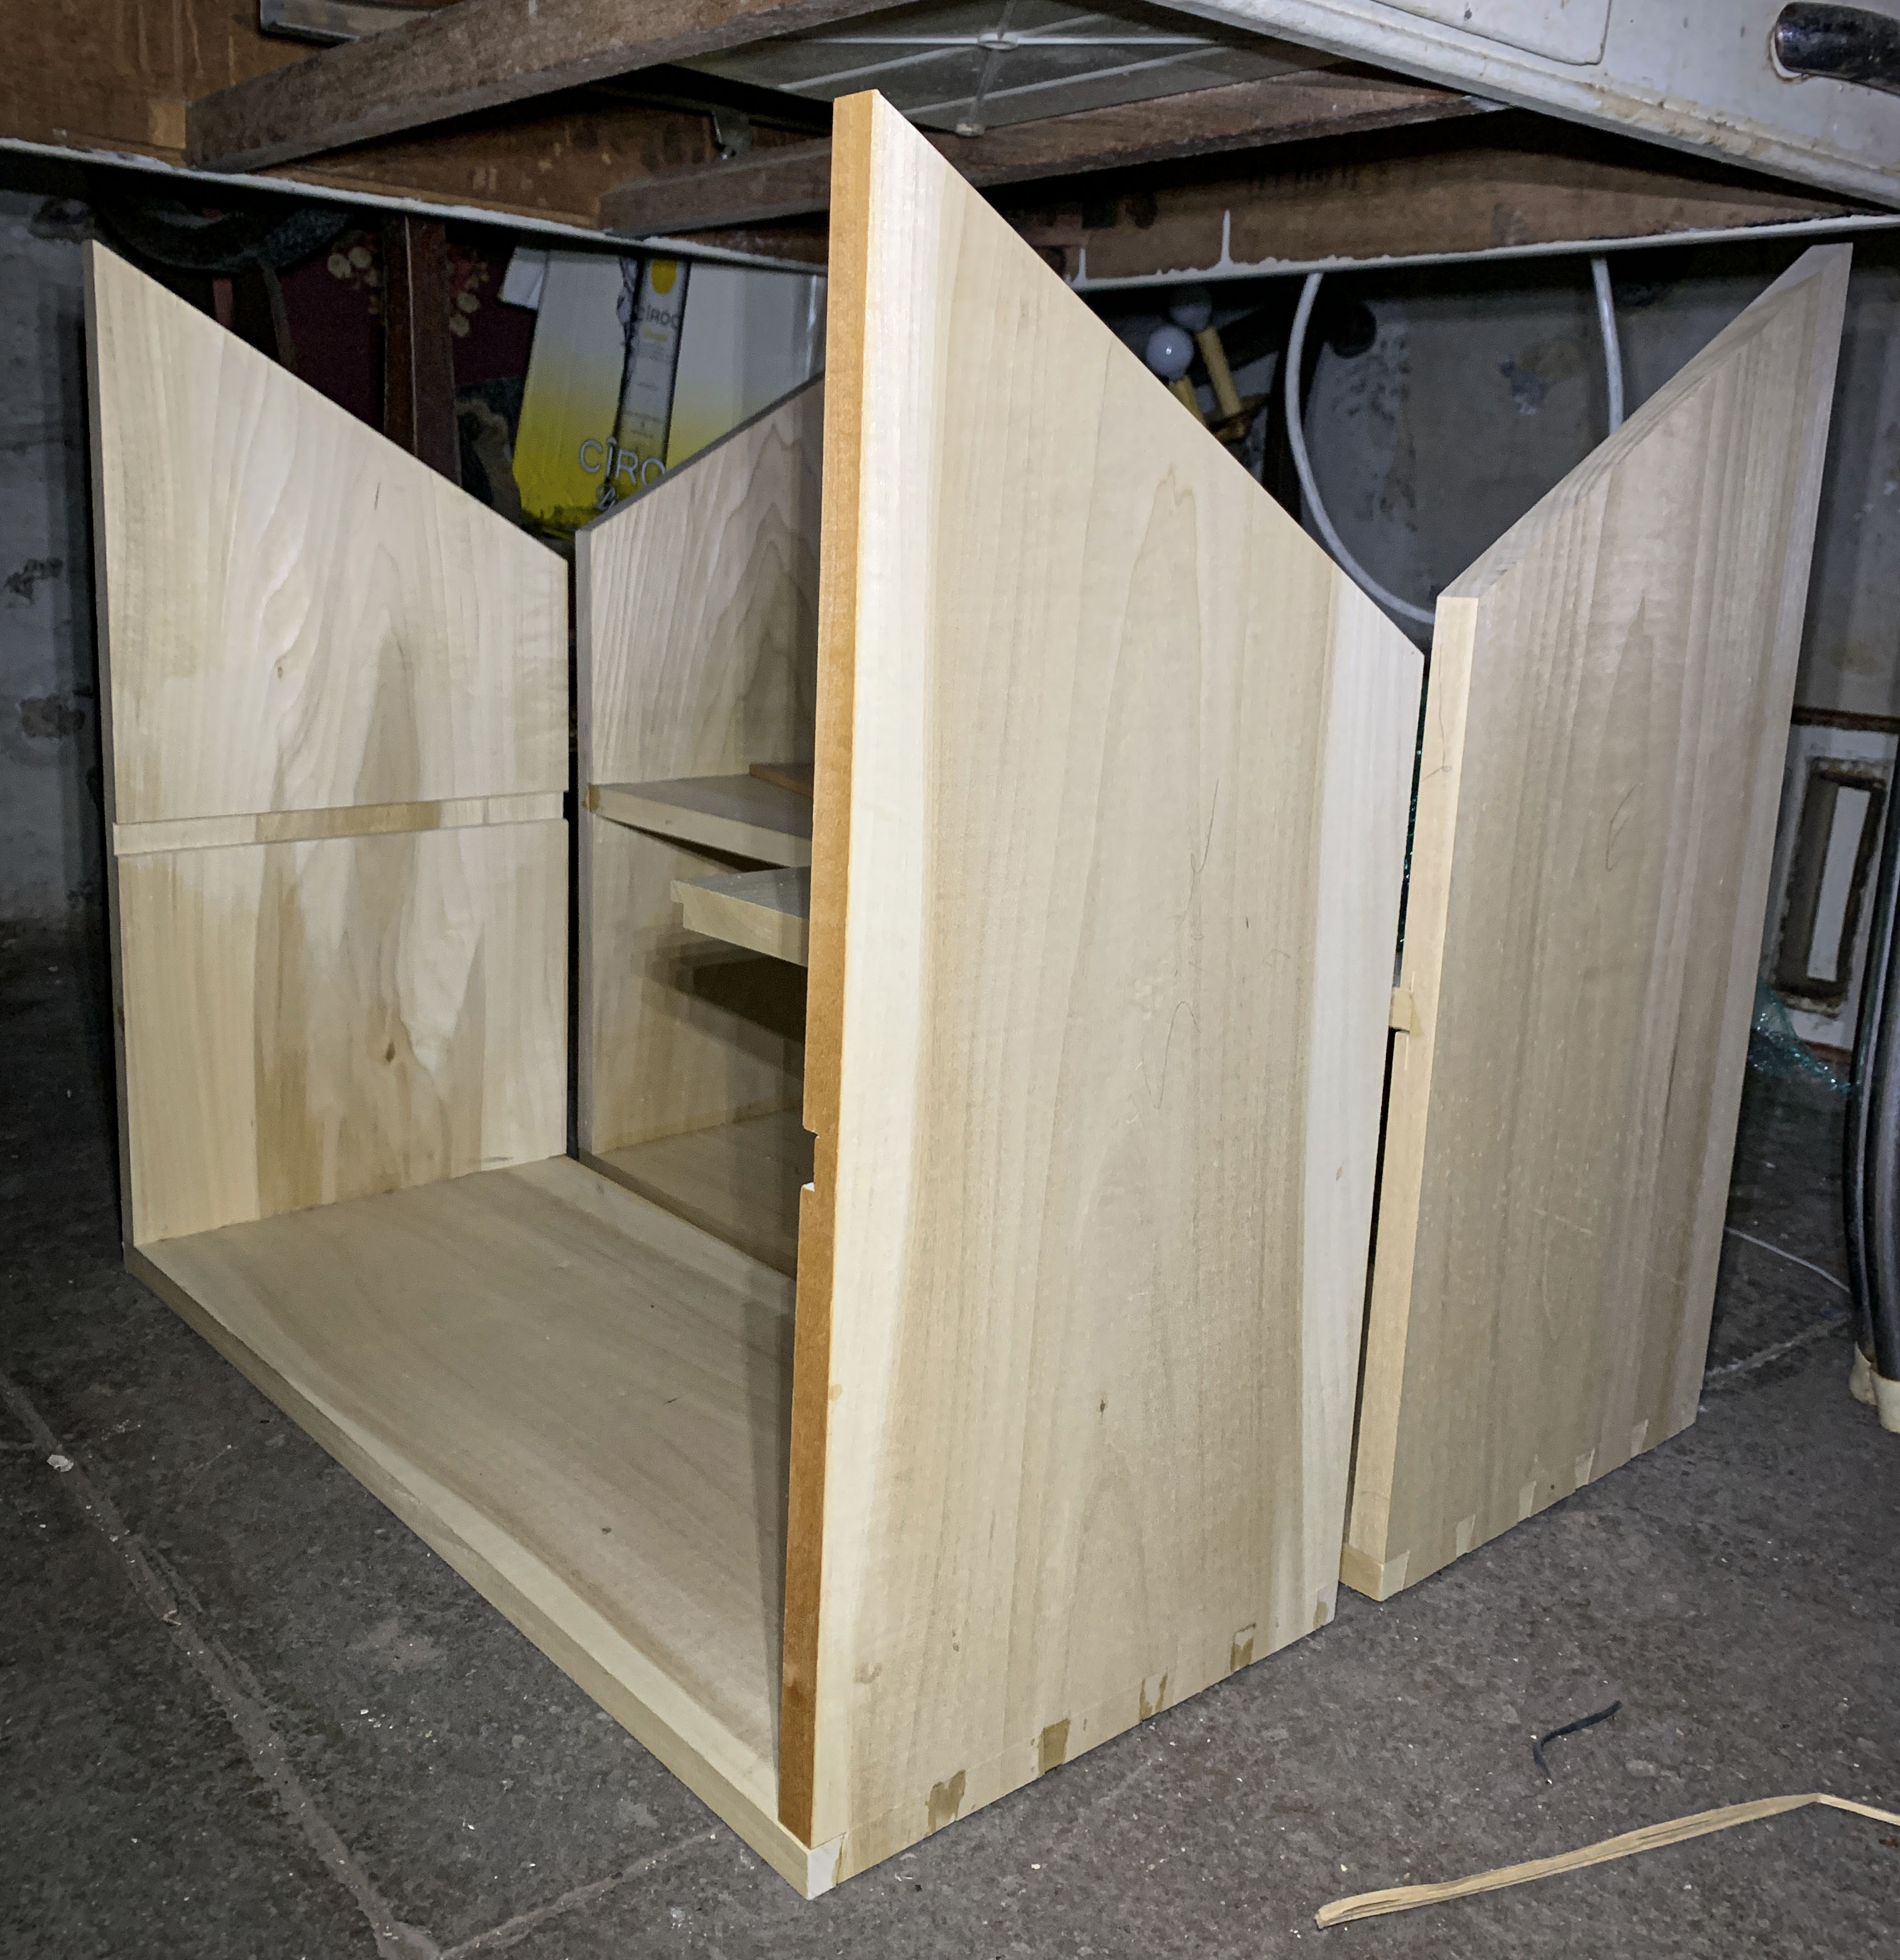
The piece was dirt-simple to put together…after Christopher Schwarz talked me out of dovetails and mortise-and-tenon joints, and into the Festool Domino (I used three of the loose tenons on each corner). Dovetails would still have been dirt-simple, and added only a little time. The door frame, though, well yeah – the Domino sped that up quite a bit. But if you don’t have a Domino, look to the biscuit joiner or even pocket screws…if you don’t mind looking at them on the back of the door frame (I would mind that). Or, of course, cut the mortise-and-tenon joints.

Overall, this cabinet is 5″ deep, 35-1/4″ high and 60″ long, and built mostly out of 3/4″-thick cherry, with random-width shiplapped backboards in 1/2″-thick pine (or maybe it was poplar). The medial style is only 4-1/2″ wide, which allowed me to simply pop the backboards in between the two outer stiles, and screw them to the rails.

IMG_7295

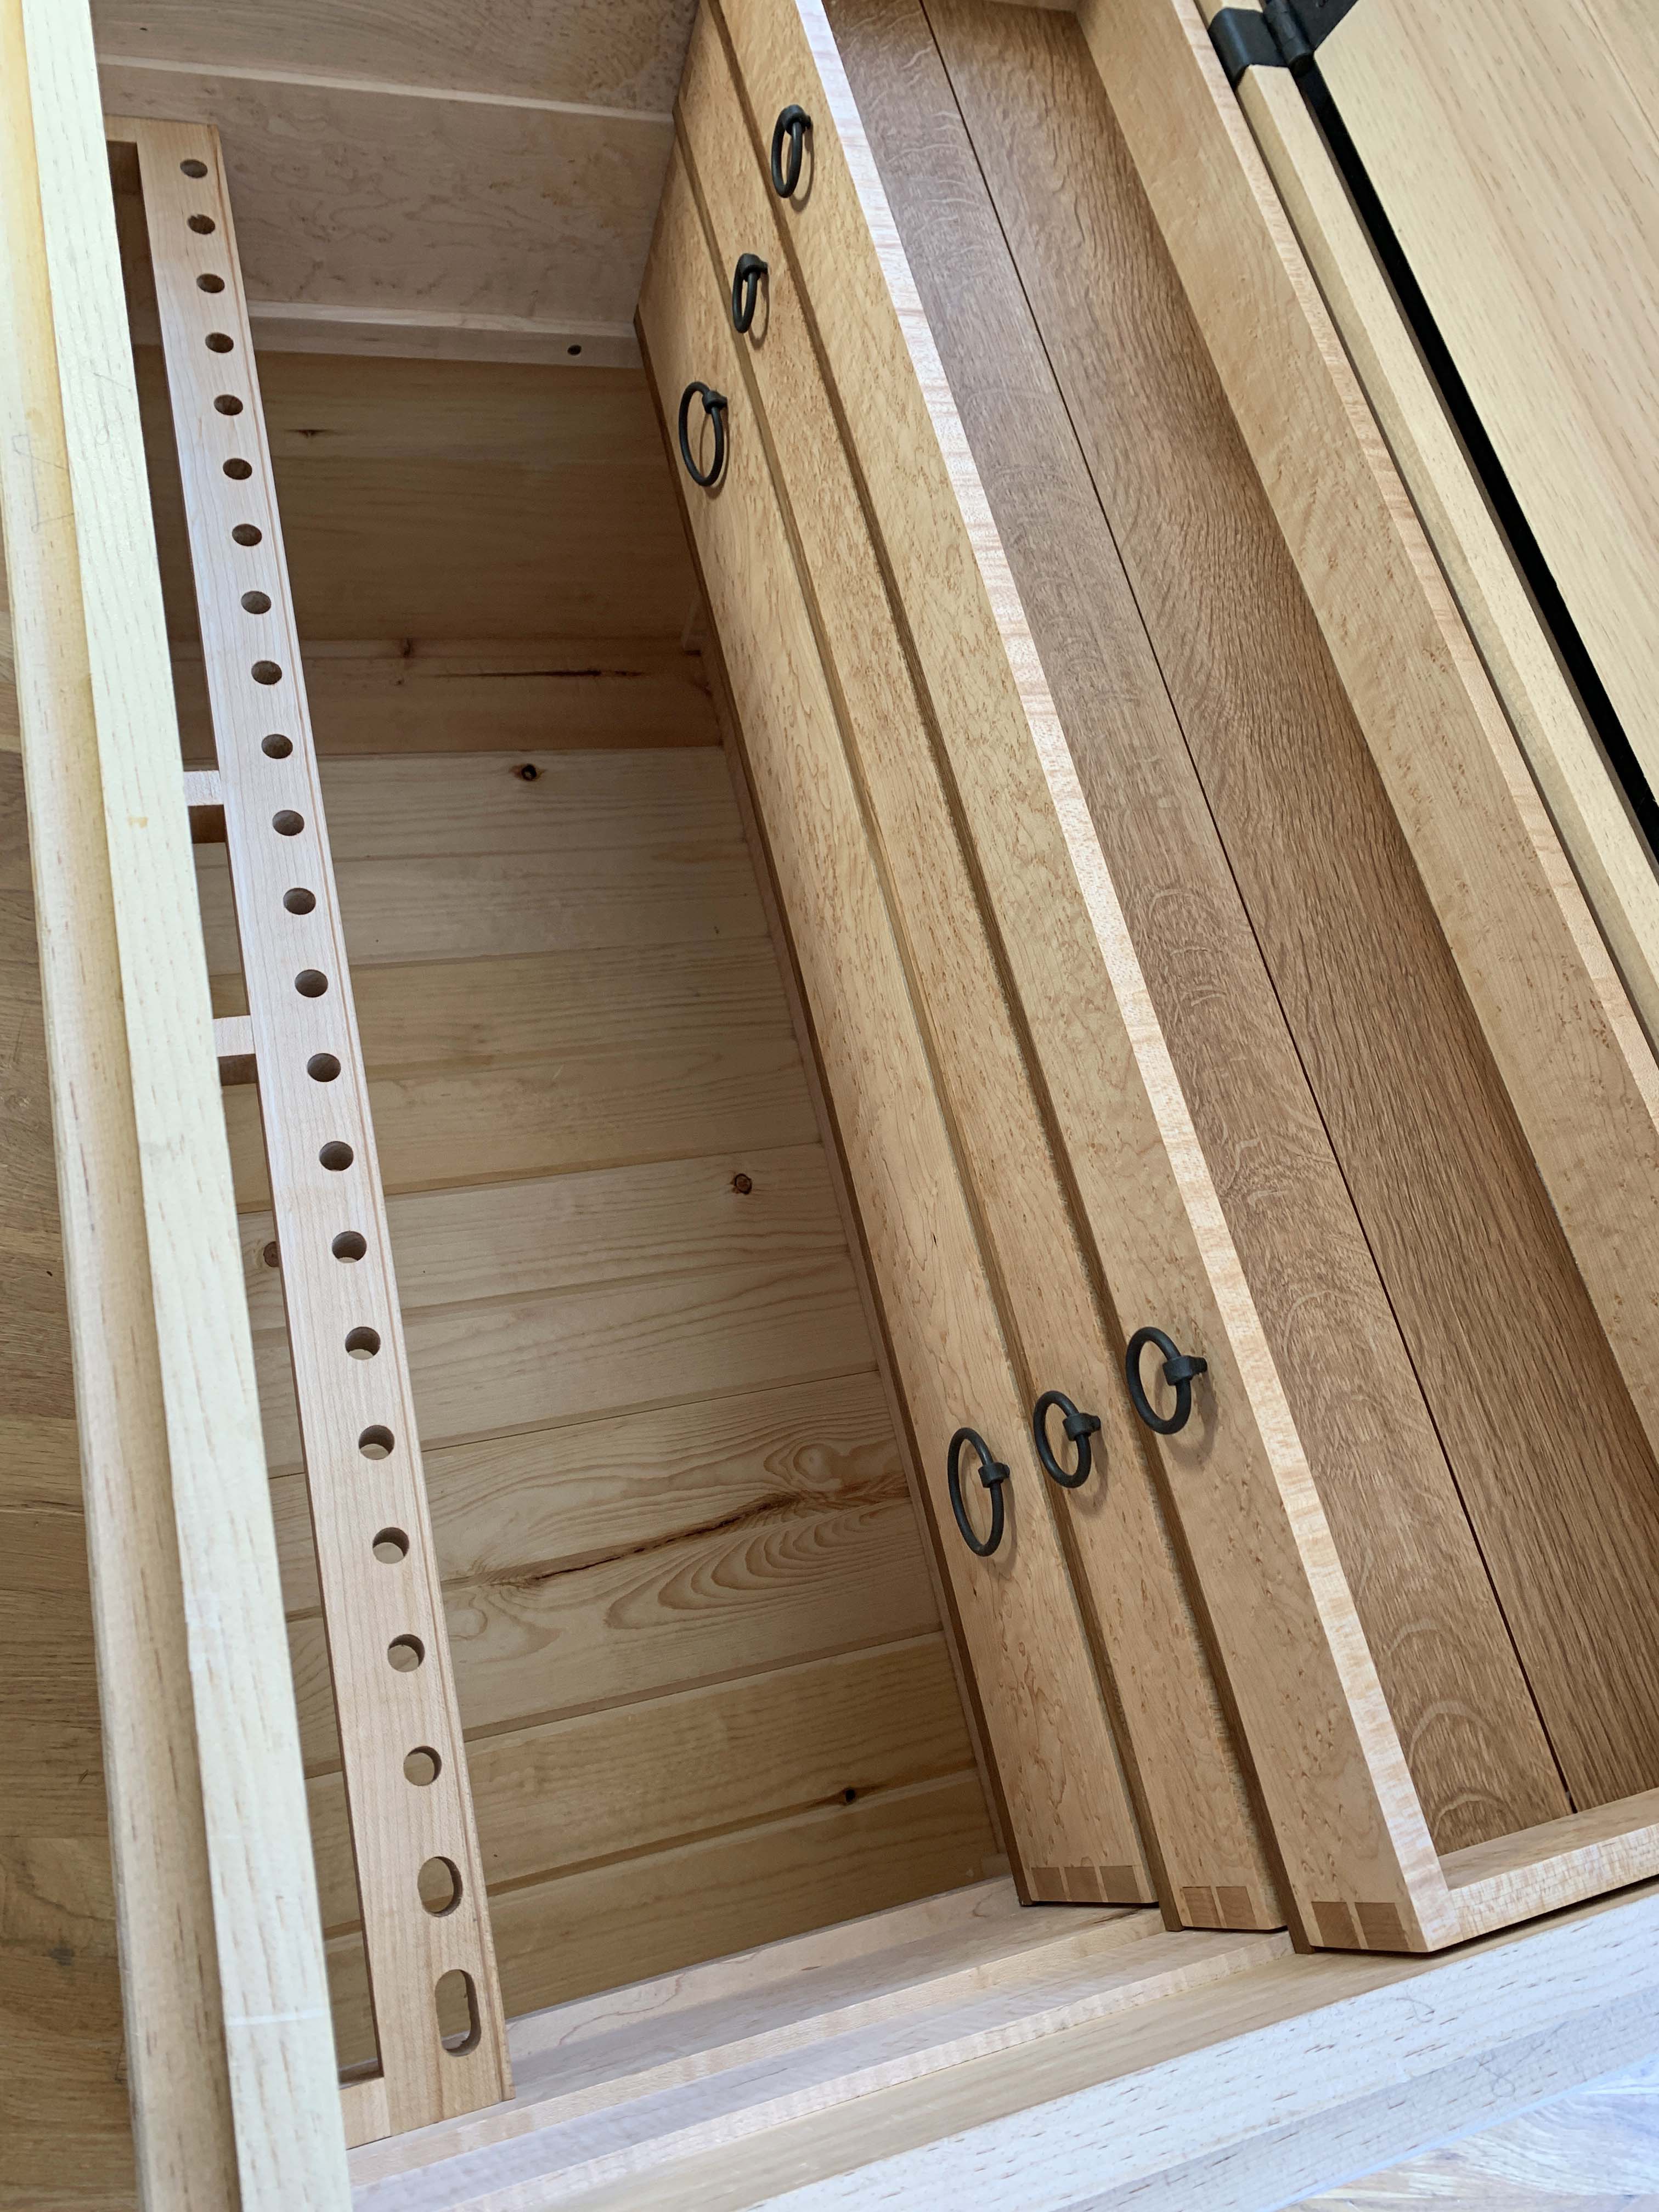
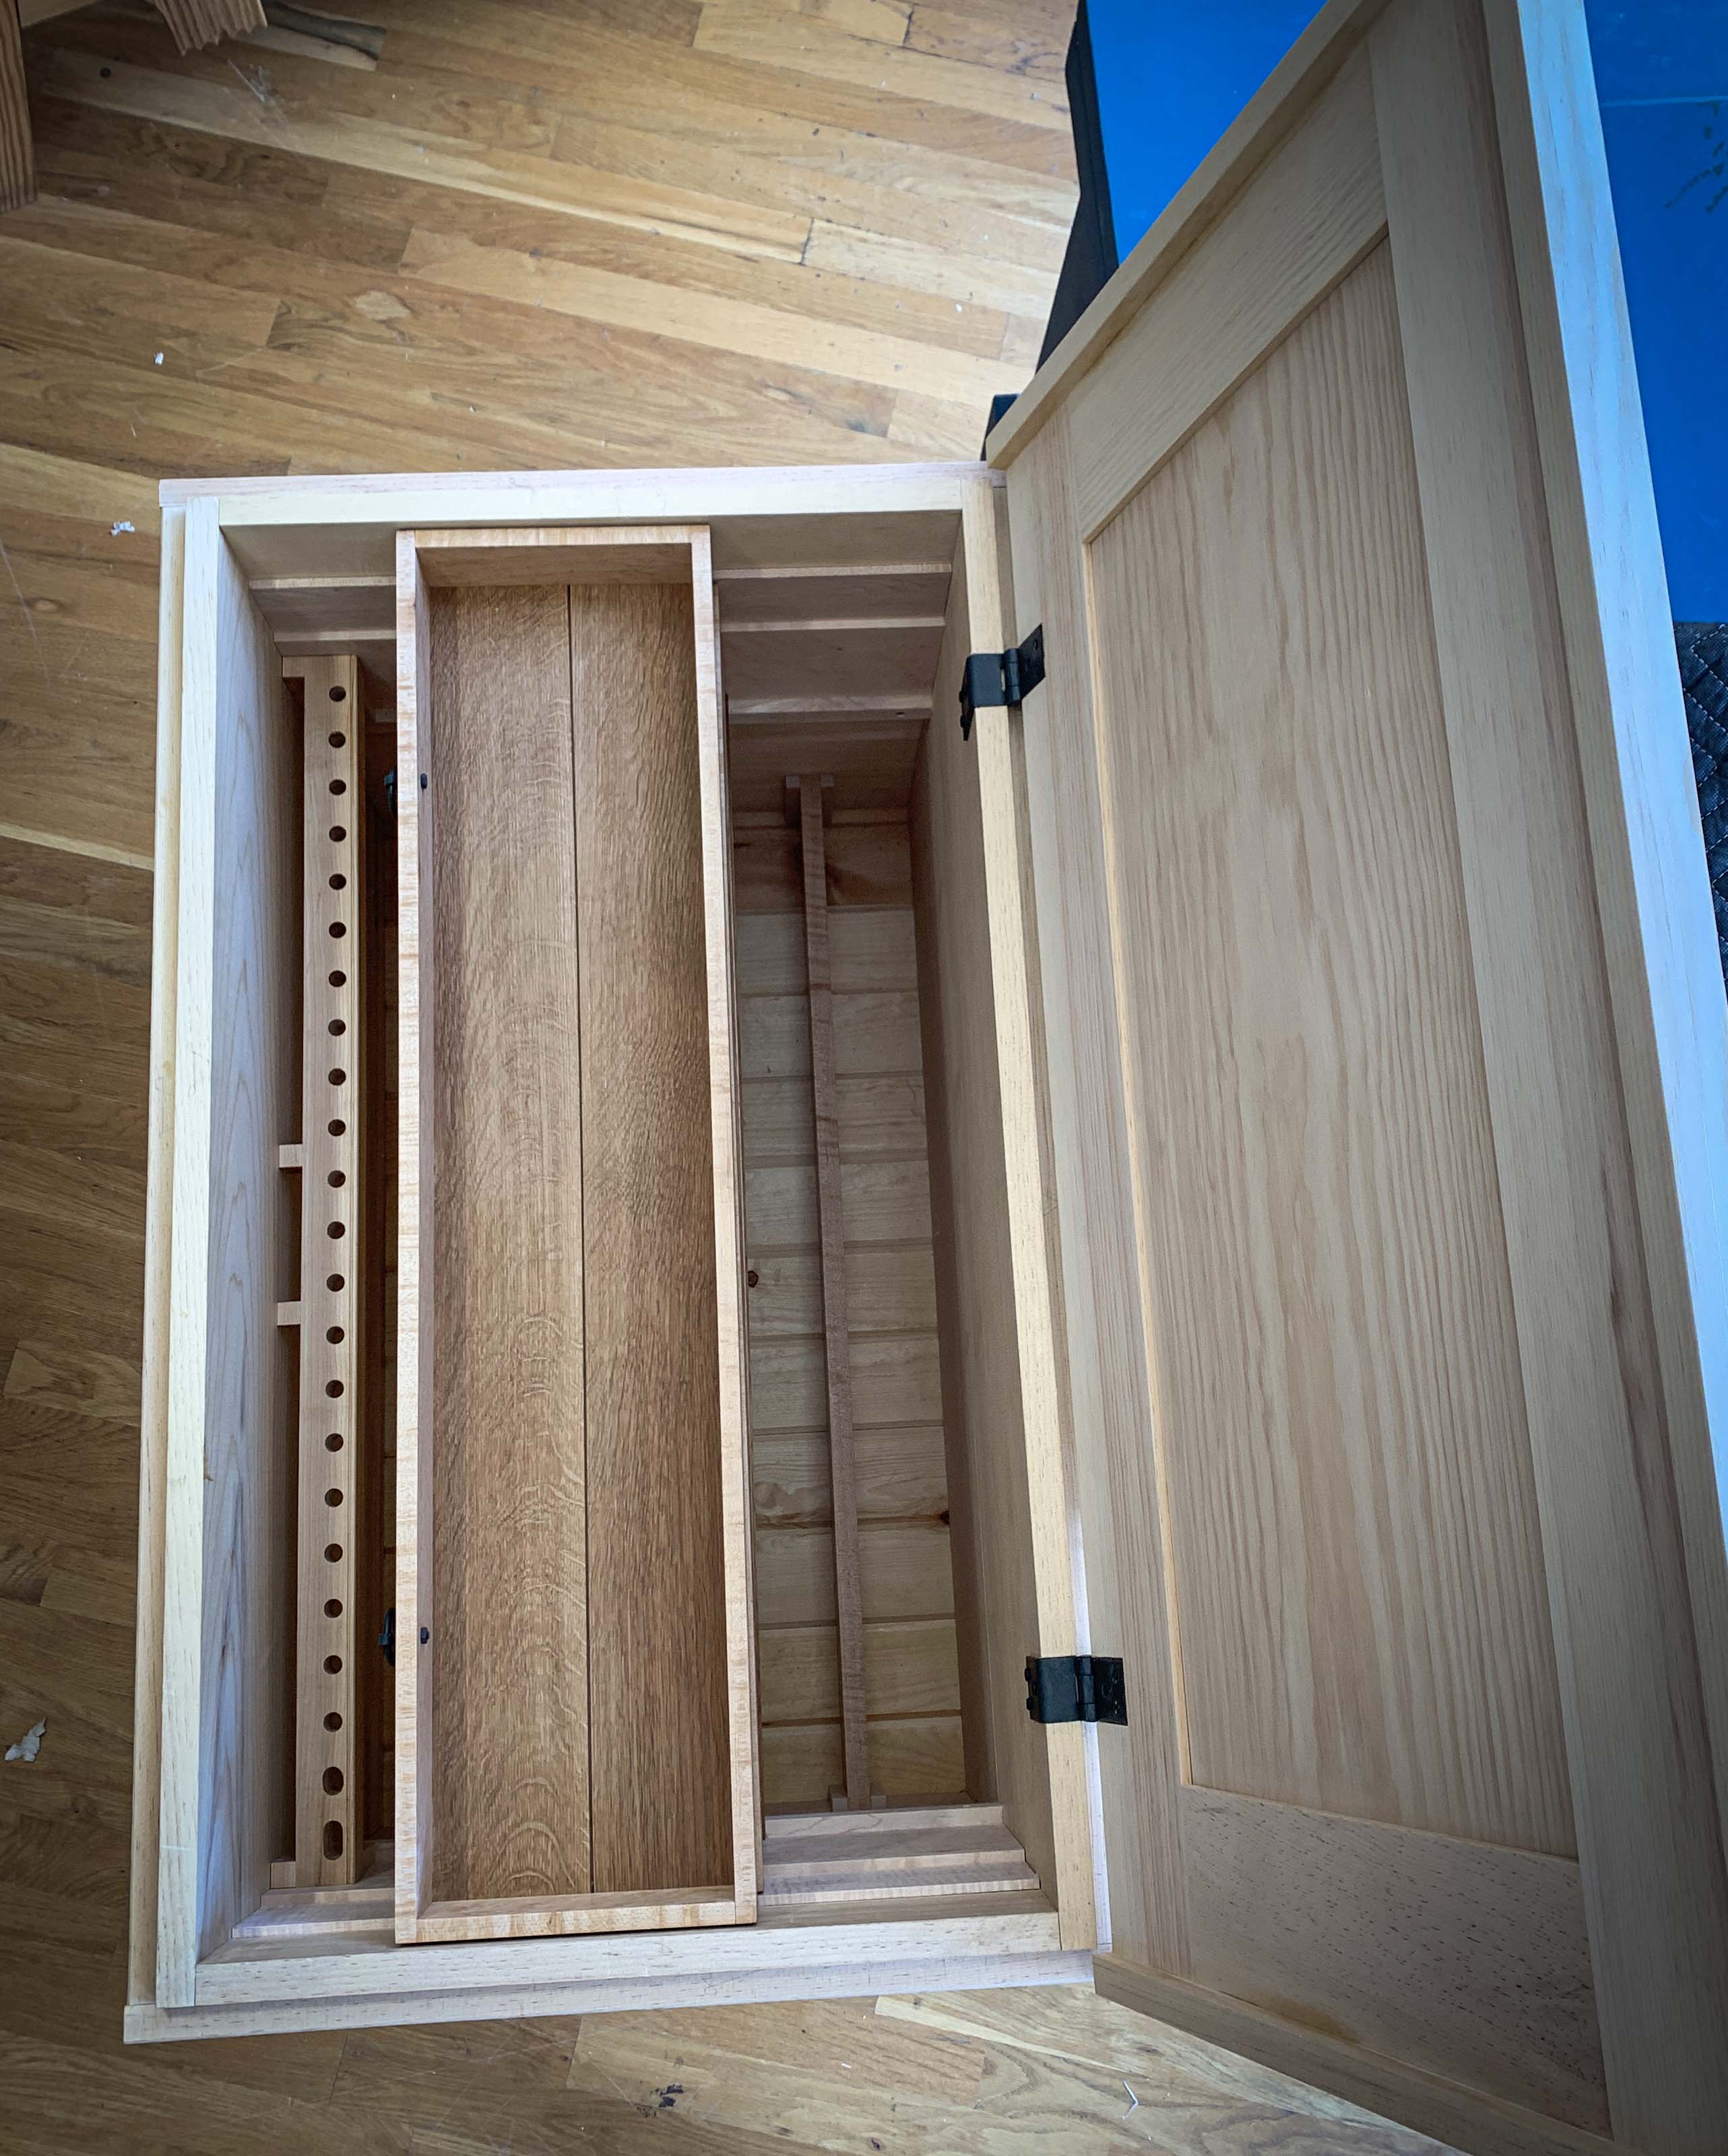
Here you can see the beaded backboards and holes on 1-1/2″ centers for the shelf pins at the front; the holes are set back about 5/8″. At the back, they’re in about 3/4″. Yes, they could/ should match…but it doesn’t really matter (heck – I didn’t notice until I went to measure…clearly I got my shop-made jig in the wrong position).

The door is inset into the left side of the case, with the medial stile arranged 26-1/2″ from the left, to visually balance with leg and medial stile in the vanity. The door is slightly too big…I have to lean back to open it if I’m standing at the front of the sink. But it is better to look good than to…well, you know.

After the glue was dry on the Dominos in the door frame (two at each corner), I routed (yes, with an electric router) a rabbet for the mirror. The mirror is held in place with silicone…which looked ugly. So while the adhesive was still wet, I added 1/4″ x 1/4″ strips of mahogany to cover it up. Why mahogany? Because we had some 1/4″ x 1/4″ strips of it in the scrap bin.

Behind the door, the 1/2″-thick, 3-3/4″-wide cherry shelves are adjustable and double as door stops; the shelf pins are set 1-1/4″ back from the front edge (that’s different than on the open-shelving section to accommodate the door).

Open copy

And now you all know that I have entirely too much hair product. And that I cannot take a straight picture.

This piece ended up being kinda weighty, so I decided to hang it on a French cleat (also known as 1/2″ ply ripped at a 45° angle). The wall half of the cleat is secured with likely too many Tapcon screws (it’s a solid masonry wall); the cabinet half is screwed directly to the top rail. Plus, there’s a 1/2″ thick scrap of ply screwed to the back about 2″ up from the bottom, to help hold the piece flat and at an equal projection from the wall top to bottom…except that the plaster wall is nowhere in the general vicinity of flat, so I don’t think that bottom scrap is even touching the wall.

IMG_7296

You can see that the cleat isn’t fully seated – the fun of old houses with wonky plaster walls! But I feel confident the cabinet will stay put.

The hinges are PB-409 from Horton Brasses, in the Polished Nickel finish. (Yup – the same ones I like for the Anarchist’s tool chest…that PB-409 is so versatile! And because one always has to order in pairs and most of what I use them for takes three hinges, I always seem to have extras sitting around.)

And that’s about it. It’s not fine furniture, but in a bathroom (or kitchen), it doesn’t need to be. After I’m gone, the next owner will no doubt redo all the bathrooms (and kitchen) – the circle of house life.

Cutlist (thickness, width, length, in inches):
Outer stiles: 3/4 x 5 x 35-1/4
Medial stile: 3/4 x 4-1/2 x 33-3/4
Rails: 3/4 x 5 x 58-1/2
Door stiles: 3/4 x 3 x 33-3/4
Door top rail: 3/4 x 2-1/2 x 19-3/4
Door bottom rail: 3/4 x 3 x 19-3/4


Posted in Uncategorized | 8 Comments

Support WOO & the WOO Pit Crew

Screen Shot 2020-02-25 at 8.10.15 PM

Kelly Harris, Claire Minihan and Aspen Golann are donating their time and expertise to help A Workshop of Our Own – a Baltimore non-profit educational woodshop for women and gender non-conforming craftspeople – with some much-needed space upgrades and equipment maintenance. With the initial donation goal for the must-haves met, a little more help from you and me means more upgrades, more educational opportunities and more woodworking outreach can happen.

Find out more – and how you can help – by clicking here.


Posted in Uncategorized | Leave a comment